Friday, September 26, 2014

Live Laugh Love

Hi you all, hope your having a fun start to your weekend, working 3rd shift, Fridays are a bit on the relaxing side for me. I take a nap and then try to stay awake the rest of the day so I don't do much to exert myself :) Last weekend I participated in Simple Scrapper Stash Bash (she has these a few times a year) well this stash bash was all about challenges and virtual tickets. In the five days I was able to do 2 of the challenges plus a speed scrap (another post explanation) so not alot of tickets but it was fun to try and I got some layouts done so that is a win for me! Challenge #2 was to create five page kits and for extra tickets to do the layouts, well I had a good plan to pump these layouts out real fast and in the process of doing this first one we had company :) It's always nice to have company and when it's 2 of the grandkids over too then it's extra sweet. So I didn't get the layouts done in time but have been working on them this week and enjoy that everything is there all I have to do is put them together.
This was created based on one challenge and I used another challenge for the actual layout with their sketch. The first challenge was for Lasting Memories Asian Theme and I had that in mind when I was pulling this kit together. I had started with the pictures and the memorabilia I found, chose a reddish color theme because of the chop sticks package. I used some of my current counterfeit kit and some of last month's kit embellishments that are still in my holding box next to my desk.
The other challenge I used was the sketch from Sketch N Scrap #65
 
I seen it thought this would work out great for this layout. Here are some close up shots of the layout:
The pictures are of the sculpture fountain that people throw coins in, this is the first thing you see walking into the restaurant and just a lovely stone sculpture.
 I used recollections Cherry Blossoms paper pad for the 2 background papers tha were just the right style for an Asian layout, used the glitter words and the extra glitter icons that was in the package that is in my current kit
I incorporated the chopsticks and the business card that I had picked up at the resurant with plans to do a layout at some point and I also found some papers from some fortune cookies that we had received when stopping to eat one of many times being there.
Both doilies, the dry embossed pick scallop punch pieces and the glitter tape was in last month's kit and really added a nice touch to the layout. The journaling card is from the current kit. This particular evening we took a friend to the restaurant for a good meal after the tractor show that we attended at in Selinsgrove. It's a ritual for us to stop and have supper there after the show each year that we go, but we go there more often than that atleast 4 times a year, I'm surprised they don't know us by name :)
Thanks for stopping by today and stop by tomorrow for another post while I'm trying to get all the challenges that I want to do or have done this month posted :)

Wednesday, September 24, 2014

September Counterfeit Kit Challenge Blog Hop


Hi you all and welcome to Counterfeit Kit Challenge September Blog Hop.
With a Sweet Relish scrapbook layout.
If you are coming from the amazing Lisa's blog then your right on track. The challenges this month are:
Challenge #1:  Own Challenge: Your turn to challenge the counterfeiters.
Challenge #2:  Selfie Challenge: Scrap a selfie.
Challenge #3:  Mixed Media Embellishment: Get messy and inky with some home-made embellies.


I decided to get messy and made a couple of homemade embellishments for my layout.
 
 I found that I enjoy making and creating my own embellishments occasionally and when challenged I do like to tackle a good one. I thought I would give the foil dry embossed piece that was in last month's kit, some pieces from this month's kit and grabbed a tag too. I used some Close to My Heart  create a shade paint (pearl) plus 2 inkers SU crushed curry and crumb cake and some glitter for fun. I also used some crackle paint and Crackled accents and glossy  accents just to see what would happen.
The tag ended up being the one that got special treatment with both inker colors and the glitter and made a fine place to use for a title. I found that when I get home from work and only have an hour or 2 to play this is the time to do these kind of creative things cause when I wake up it's all dried and ready to go onto the layout.
I used a sketch for my layout from Sketch N Scrap #64

 Some detail photos of the layout:


The added mixed media embellishments on the layout 
 Added a few other things from the kit including the word art, journaling tag, washi tape and arrows
I really enjoyed playing yesterday and putting this layout together. 

Now your off to Leslie's blog: Out of thte Mire to see what challenge she took on.If you get lost the list of the hop is below.

Here's the order for the Blog Hop (you don't have to include the list in your post but you must link to the person below you in the list):


Monday, September 22, 2014

CCC: 2014 Pumpkin Patch

Hi you all, hope you been doing well. Wow 2 weeks since I posted, I've been a bit busy. But this week will see more posts as I catching up with my scrapping. Today is Creative Cutting Challenge: Fall theme layout I did with Creative Pointe's Pumpkin Patch die cut:
This is the file I used:
Pumpkin Patch - Click Image to Close
I also found a couple of scallop frames from the Silhouette store to use too
 A close up of the cut file I used for the title block
 Zachary's chosen pumpkin for the patch
 The red cardstock, the 2014, the chevrons, the just cord, the explore sticker and the hello there tab came from my current Counterfeit Challenge kit The rest of the papers came from a K&Company Que Sera Sera designer paper pack
the border was punched with Martha Stewart's Spider Web punch

Off you go and give a try to the challenge we hope you all play along with us:
Rules are simple the project must be new works and  Each project must contain at least one SVG (SCUT, MTC or similar) file die cut and that file must be clearly apparent or you must state what piece of the project is the SVG (or similar electronic) file.  A file name or creator link would be helpful to those viewing your project. NOTE:  A project using only a Cricut Cartridge file is not eligible.  SUBMISSIONS WITHOUT ANY MENTION OF AN ELECTRONIC CUTTING FILE WILL BE DELETED.  Blog owner reserves the right to delete any submission deemed ineligible without notice to entrant.
For more details about the rules you can go here

I will be submitting this layout to this challenge:
Lasting Memories: Autumn Colors

Monday, September 8, 2014

CCC: First Day of School 2012

Good Morning you all and welcome to the 1st of this season's Creative Cutting Challenge post. the theme is Anything Goes. I used the freebie die-cut that was offered on the CCC last post for my layout The School House file:
This is the file I chose to use:

I resized it down to fit the area I wanted to to fit on the layout. This cut can also be made into a card very easily with your cutting software and welding it.
 This is the sized down die cut and it worked out perfectly for this part of the layout. The diecut is actually cut with light red paper for some reason picasa is making it look pink sorry about the bad coloring on the pictures.
Alphas is from last month's kit Simple Stories Awesome sticker sheet. The tag journal card is from a Recollections Journal Card Pad: Laugh and the side cut piece about recess is from the Basic Grey Kneehighs & Bowties snippets pad.
 A picture of Elias and Avery. I found a package of Jolee's boutique dimensional stickers (1st Day of School) in my stash under the theme of school and knew it was perfect for the layout and now it's out of my stash. So I used the largest one for the title of the layout and the others to make a border in between the pictures
 A picture of Isabelle heading off to Kindergarten :) She's growing up so fast. these are a few of my grandkids heading to school on the 1st Day in 2012. I'm awaiting on this year's pictures to come in the mail from Snapfish. Most of the papers are from this month's Counterfeit Kit and all came from my stash. The blue polka dot border is washi tape.
I used a sketch from pinterest for the layout
scrapbooking sketch by shimelle laine @ shimelle.com (photos could be 3 square or 3 landscape-oriented rectangles)
Off you go and give a try to the challenge we hope you all play along with us:
Rules are simple the project must be new works and  Each project must contain at least one SVG (SCUT, MTC or similar) file die cut and that file must be clearly apparent or you must state what piece of the project is the SVG (or similar electronic) file.  A file name or creator link would be helpful to those viewing your project. NOTE:  A project using only a Cricut Cartridge file is not eligible.  SUBMISSIONS WITHOUT ANY MENTION OF AN ELECTRONIC CUTTING FILE WILL BE DELETED.  Blog owner reserves the right to delete any submission deemed ineligible without notice to entrant.
For more details about the rules you can go here

I will be submitting this layout to these challenges:
Stuck on U Sketches die cut challenge: Class is in!
Scrap & Play: Challenge #9/School Supplies
Scrap Our Stash: Challenge: Stash Challenge #18 Back to School

Thursday, September 4, 2014

Using a Chipboard Frame: CKC Challenge #1

Hi you all, over at Counterfeit Kit Challenge blog, they have a twist for the 1st Challenge: Challenge #1:  Create a challenge for US!  Post it on your blog and create something based on your challenge using your kit for this month.
So this is what I choose for the 1st Challenge which I had found over at October Afternoon's website in the tutorials section: Using a Chipboard Frame
Here is what I did with it:
Isn't this a cool way to use up a chipboard frame. I used a CTMH Irresistibles Make it count chipboard die cuts chipboard grid for mine, I cut it down to 10" for a background piece
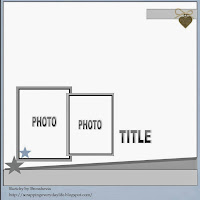
I added washi tape to 3 sides, took the measurement of the individual windows and cut up vary pieces of papers for it
 I also added tape to the backside for the cut pieces to be attached to the frame
 I got the pieces where I wanted them and attached it to the frame. The sticker on the background paper was attached after deciding what I was doing with the frame. Added some foam tape to certain spaces that needed to keep the height of the frame.
I added a cluster of papers and washi tape to that top open spot to frame it off and give a nice little title for the layout. The arrow and heart is from the white bling sticker sheet of words.
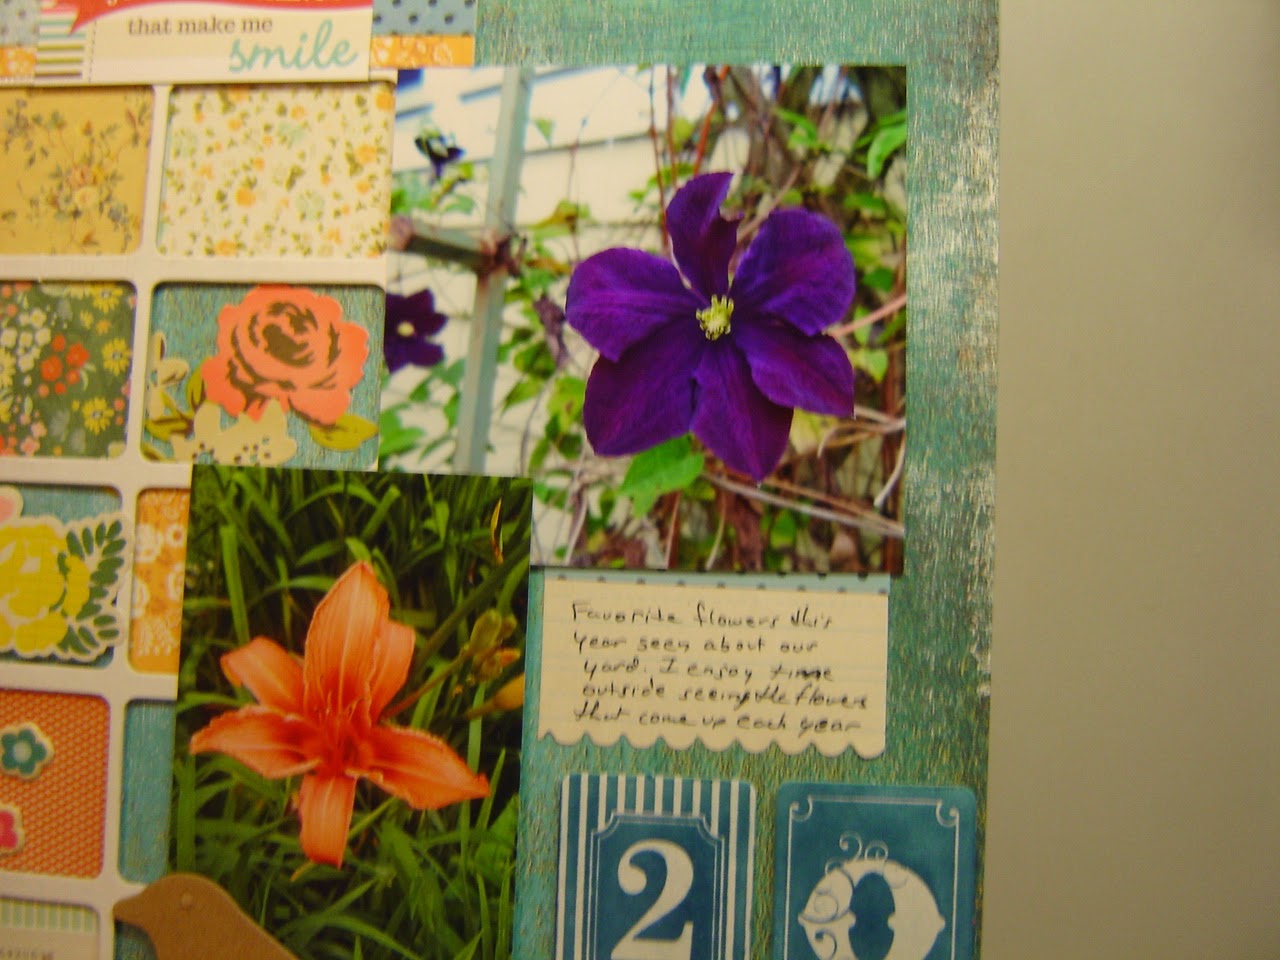
 I decided to do flowers from 2013 as a 2nd though cause of my choices of small prints for the windows of the frame. So my 2 favorite flowers in 2013 were highlighted on the layout.
 The 2013 are some of the chipboard tiles from the actual sheet. Now this stuff is pretty cool. It comes white and you rub ink on it and you get this resistant look.
 Added a few chipboard birds
 These 2 flowers are in our yard so I get to enjoy them each summer, one thing I do enjoy is spending time in our yard walking about and enjoying the peacefulness and the beauty of summer.

I was so glad to stumble across this tutorial and gave it a try this has to be one of my favorite layouts this year, just might have to frame this one and hang it in my craft-room. It's nice to do something different with your craft . I hope you give this challenge a try :)


Tuesday, September 2, 2014

Up Down All Around

Hi you all, hope you had a fabulous day yesterday :) I couldn't wait to get into my new Sept. Counterfeit kit and do some scrappin so I check out a few sketch challenge sites and came across Let's Get Sketchy post and used that for the basis of my layout. I had more photos that I want to use than that in the layout so I made the large one a collage and it worked perfectly for the chosen title.
the sketch: Team A September week 1
http://letsgetsketchy.blogspot.com/2014/09/team-september-week-1.html

This was super fun to put together and a great sketch for the pictures.
 Brandon was having such a good time on the ride :) I included washi tape for the bottom border and fun letters for the title
 I thought this tag was a good choice for the layout.
 My journaling included in the top right corner block with a cluster of words included and a fun cork star
 Yep this is definitely and interesting ride, not one I'm interested in riding. Have a great day you all :)

Monday, September 1, 2014

September CKC Guest Designer

Happy Labor Day!
Wow I can not believe I was chosen for Guest Designer over at Counterfeit Kit Challenge Blog! Wow I am truely honored and excited for this, I have to thank Cindy of Cindy's Creations she is the one that introduced me to CKC last year and I have been enjoying the blog ever since. Where else can you go each month, make a fantastic kit each month from your stash, play with some fun challenges and get those memories scrapped....
Here is the fun inspiration for this month's kit:
 August Kit: Island Paradise
It's called Island Paradise, wow it is so cool! The first thing I notice is the geometric designs going on and the blues and yellows, gliiters, corkboard and blocks.

So this is what I came up with: Geometric Happy

The papers:
straight on shot didn't turn out so good:
I have a good mix geometric, florals and words going on.
They also have a cardstock add on and this is what I pulled:
The extras:
 Stamps I chosen this month, some clips, lots of tags and jute cord
 I also located a piece of cork  paper in my stash that I'm gonna try to forge the chipboard things in the original kit
 Some cute new tags and PL cards
 In this picture under the stamps on the right hand side there is a CTMH Irresistibles Make it Count chipboard die cuts. Found out recently these are pretty darn cool and I don't know why I haven't used them before. You will see this in an upcoming blog post.
 The alphas, stickers, washi tape and chipboard shapes
 I found some blue thickers like the thickers in the inspiration photo and I have the words but in white glitter.
Here is a CTMH Irresistibles Make it Count chipboard die cuts.

*I do have the option available to use whatever I need from my stash especially since I do alot of challenge sketches so just never know what I'm gonna need for those: Ink, enamel dots, rhinestones and so on

Thanks for stopping by today and please enjoy the hop, I plan too :)
Order of the Hop: